
By the time you read this article, Apple’s cloud storage and cloud computing service known as iCloud would have already exceeded 320 million users. All of these users are able to store data such as music and iOS applications on remote computer servers for download to multiple devices. It also serves as a data syncing centre for email, contacts, calenders, bookmarks, notes, reminders and other data. Here is how you can get iCloud up and running on your iOS device in a few easy steps:
A: Setting up your iCloud Account on iOS Gadgets
Step 1: Ensure your device is running on the latest version of iOS
From the Home screen of your device, go to the “Settings” menu; now select “General” ->“Software Update”to check if there is an update available
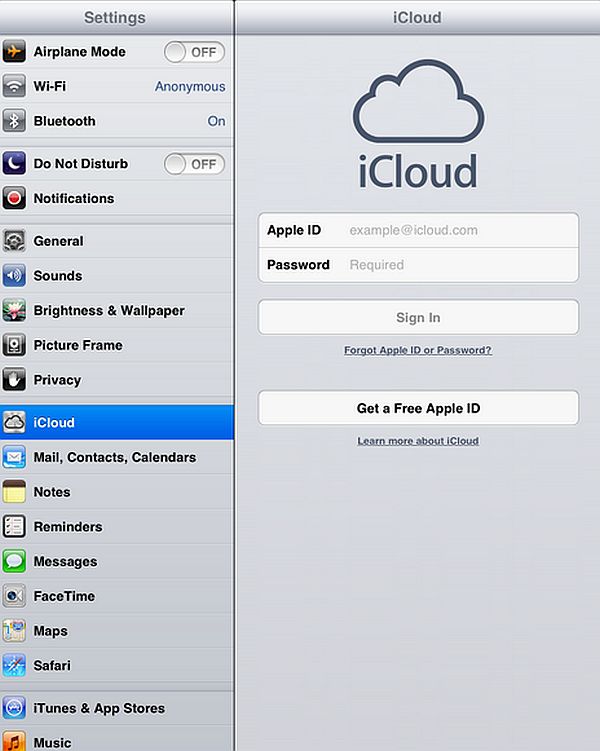
Step 2: Turn on iCloud
After you have completed the update to the latest version of iOS, either you can follow the instructions in the setup assistance to activate your device and set up iCloud, or you can tap the “Settings” icon on the Home Screen, “select iCloud”and thenenter your Apple ID if you already have one and proceed to enter the password. In case you do not have an Apple ID created already, Select “Create a free Apple ID.”
Step 3: Enable data/downloads.
Use the “ON/OFF”sliders to enable data for your iCloud storage. For example, you can enable “email”and “Documents and Data” but leave your Photo Stream disabled.
Step 4: Establish Synchronization with iCloud
Select “Storage and Backup” and then switch on your “iCloud backup”using the corresponding button to synchronize your iOS device’s data and files with the iCloud.

B: Setting up your iCloud Account on your Mac
Step 1: Make sure your Mac is running the latest version of OS X
If you have not updated to the latest version of OS X already, Go to the Apple Menu and choose “Software Update”to check if there is an update available for your Mac.
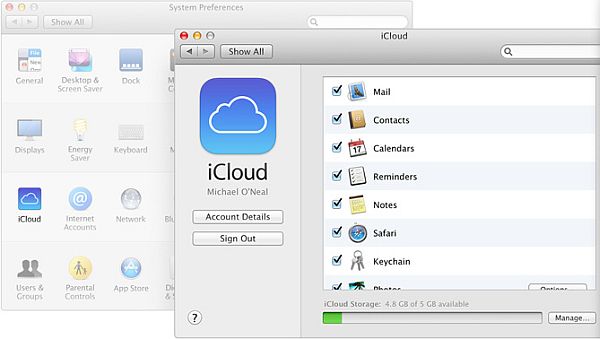
Step 2: Turn on iCloud
From the Apple menu on your Mac, choose “System preferences.”Then go to “iCloud.”
Step 3: Register with your Apple ID
Enter your Apple Id if you already have one and proceed to enter the password. In case you do not have an Apple ID created already, Select “Create a free Apple ID.”
Step 3: Choose your desired iCloud services
From the list available, you can now choose the services you would like to enable. For example, you could choose Notes and Reminders while leaving the rest of them unchecked so that you could sync the chosen ones with your iCloud account.
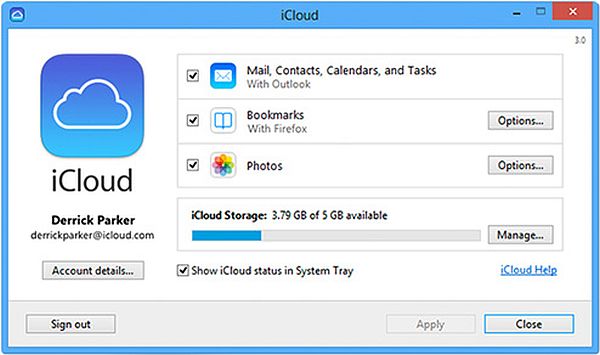
C: Setting up your iCloud Account on your Windows PC
Step 1: Download the iCloud Control Panel
To download and install the iCloud Control panel, follow the link on Apple’s Website. Once downloaded and succesfully installed on your Windows PC, open the iCloud Control Panel.
Step 2: Register with your Apple ID
Enter your Apple Id if you already have one and proceed to enter the password for authentication. In case you do not have an Apple ID created already, Select “Create a free Apple ID.”
Step 3: Select the iCloud services you want to enable.
You can now choose the services you would like to enable from the list available. For example, you could choose Photo Stream while leaving your Tasks and Mail unchecked so that you could sync the chosen ones with your iCloud account.
Considering what a hassle it can be keeping your information and content up-to-date across all your devices, iCloud has proven it invaluable to millions of people worldwide because it does all of this automatically and wirelessly, once it is set up.